Kategorier
Projects

Åhléns Checkout

My first major project at Åhlens was changing payment provider to Adyen and at the same time converting the existing checkout to a whole new experience.

The existing checkout was very cumbersome to use with several steps before even being able to complete a purchase and for every step customers were dropping off.

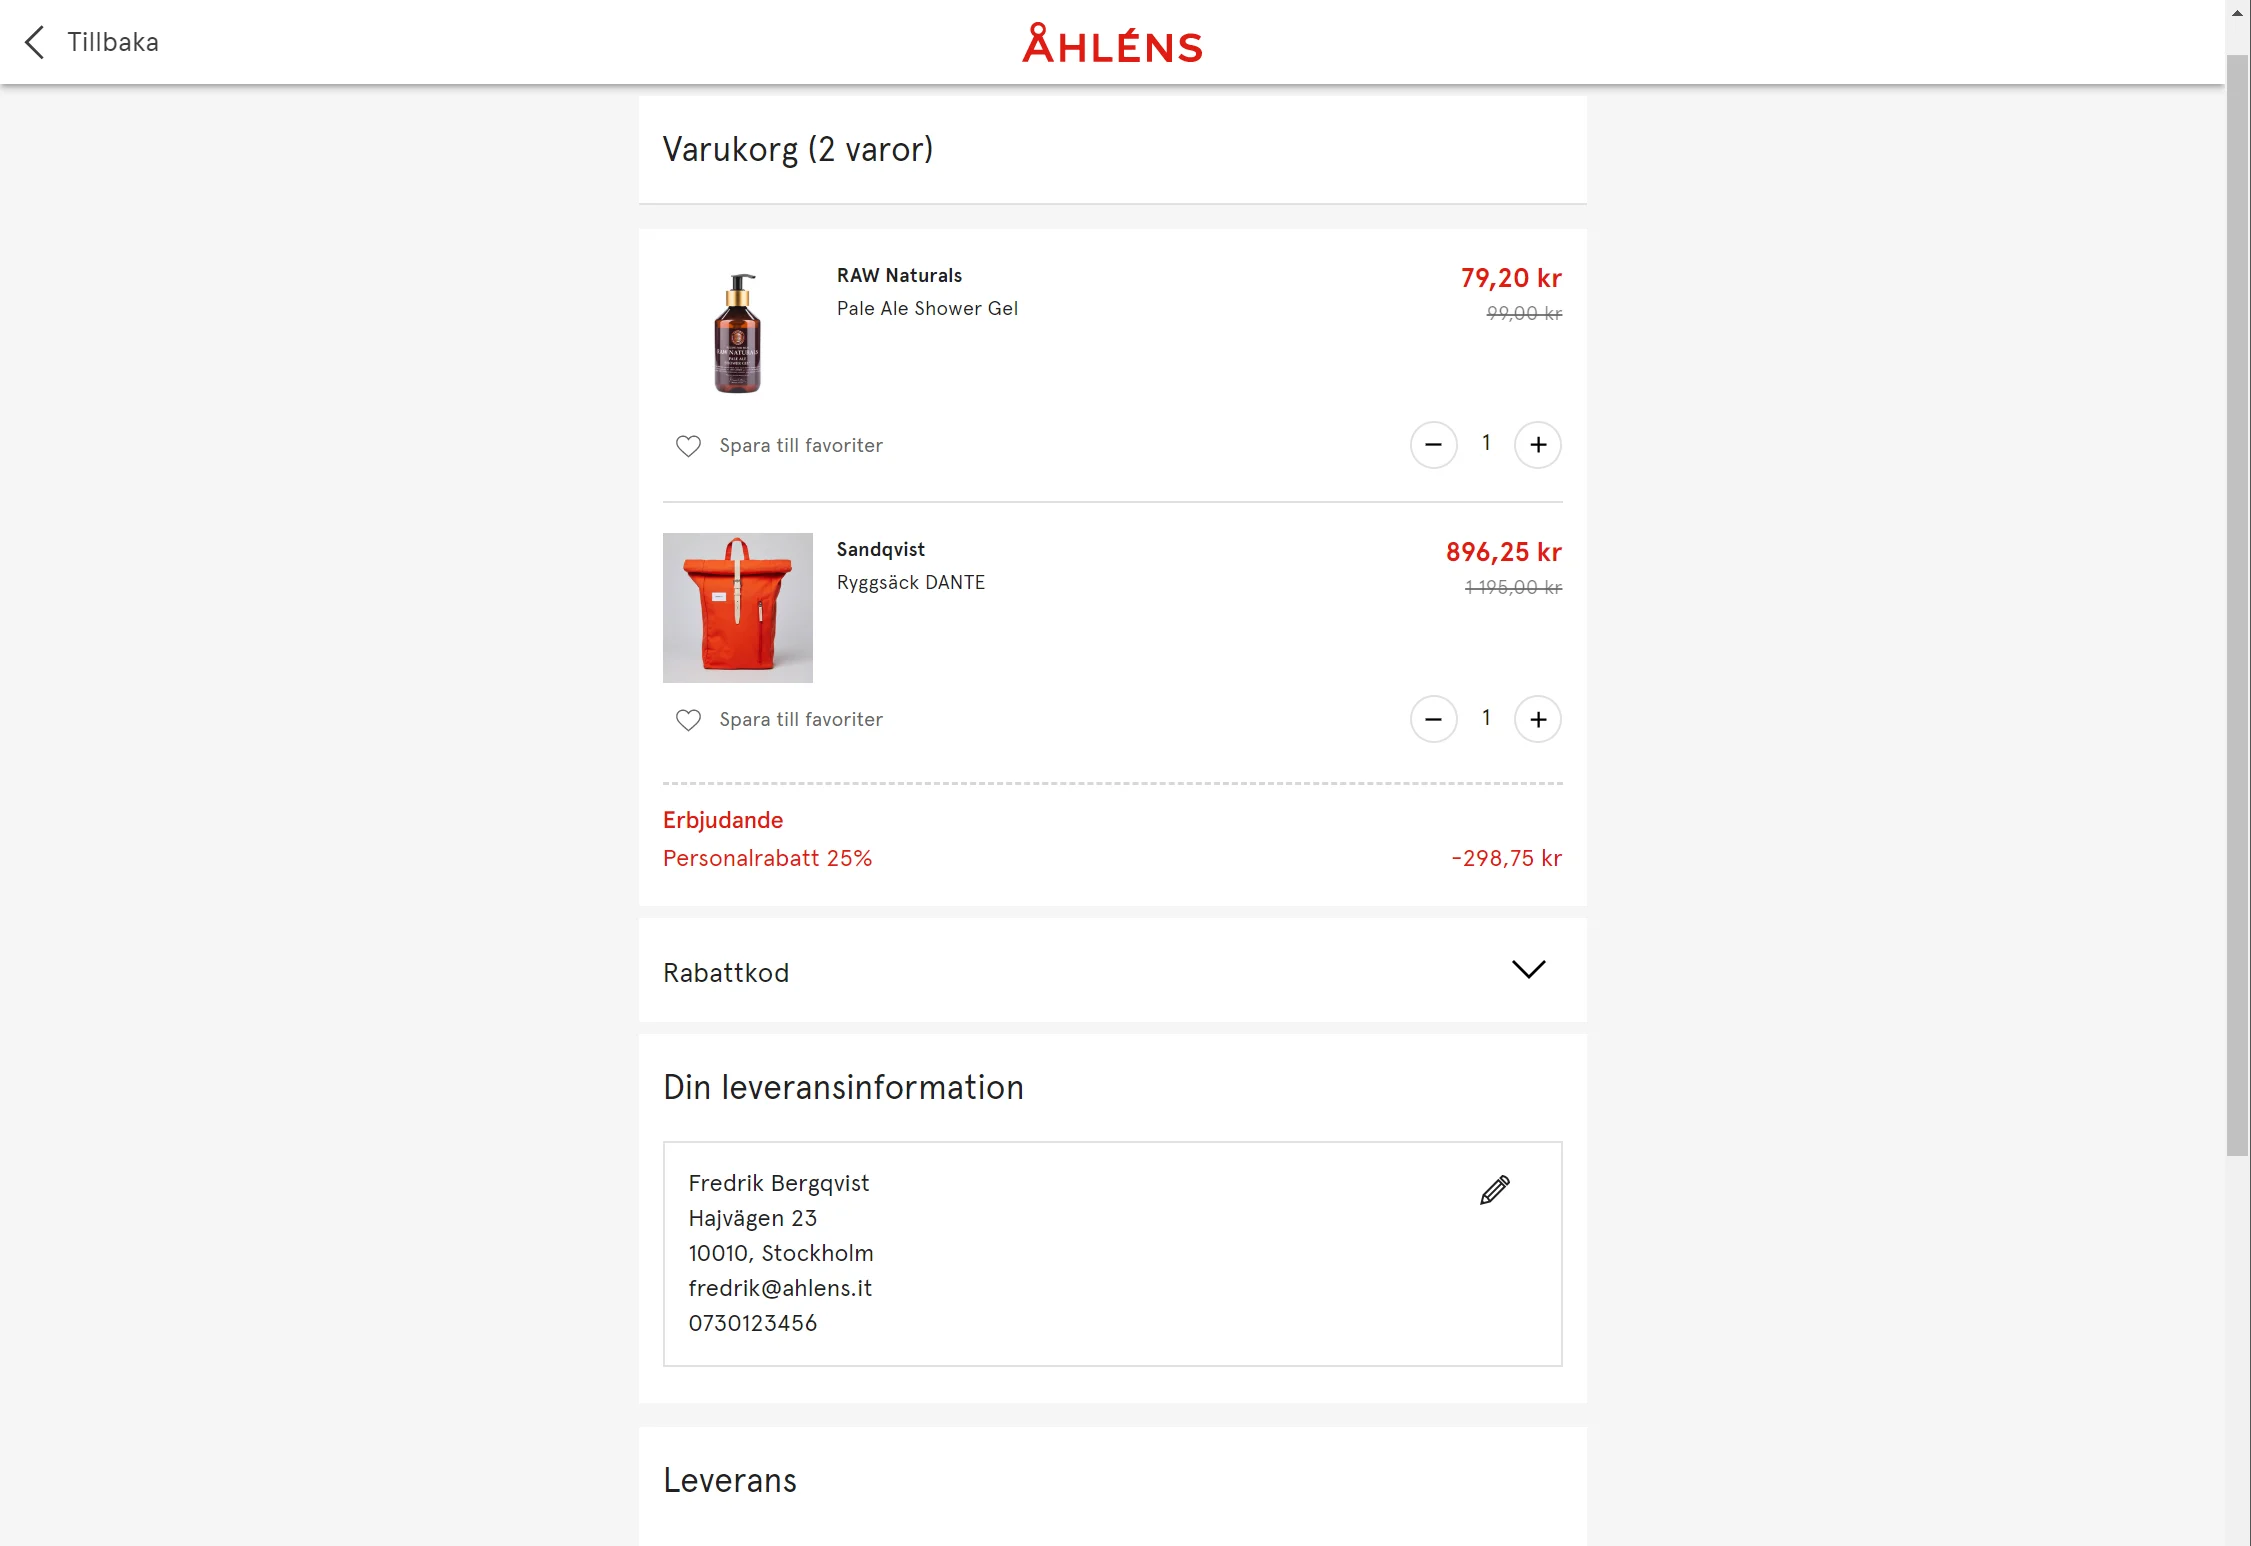
So much UX and design time was spent streamlining the checkout experience, trying to reduce the number of steps the customer has to complete.

In the end we went from a five-step checkout to, for logged in members, a one- step checkout using the default values.

Revenue
800 m
Monthly visits
>3 m
Mobile devices
79%

Tech stack

  • TypeScript
  • React
  • Redux
  • Material UI
  • Storybook
  • Jest
  • Lerna

We decided to do a total rebuild, using React and Redux to build a single-page app using only REST APIs so that the checkout can be separated from the back-end in the future.

Lerna was used to split the project into different NPM-packages for reuse on other parts of the website.

All components was developed in a Storybook environment which worked well since the whole checkout is REST-based.
The added bonus with using Storybook is the we automatically get a component library and style guide of the existing components.

Services

  • Adyen
  • Klarna
  • Swish
  • Ingrid
  • Intershop 7.9

The checkout relies on several external services for payment, tracking and shipping. With Adyen as our payment provider we use widgets for both Klarna and Swish. We also use a widget from Ingrid to handle shipping and where to pick up the package.

Learnings

Use a component library
Using Material UI was a great decision that not only gave us ready to use components, which made building custom components really easy, but it also gave us a base design that we could build on, saving perhaps as much as 25% development time.

Beware bad APIs
Unfortunately the REST API in Intershop 7.9 leaves a lot to be desired, with several calls having to be made for every basket update.
This is said to be better in Intershop 7.10.

Kategorier
Frontend

How to mock the Redux useSelector hook

There is an official way of using RTL with redux as some people pointed out, but for small quick tests mocking useSelector may still be of use. 🙄

Recently I finally made the switch from Enzyme to React testing library (RTL) which also means that instead of rendering components using shallow like Enzyme proposes, with React testing library the whole component and its child components is rendered, much like Enzymes mount.

The switch to RTL coupled with using hooks instead of HOCs when using Redux got me writing a lot of new component tests but I did run in to some problem when I tried to use the useSelector-hook from Redux multiple times expecting different responses.

The component that I wanted to test as a search component that made calls similar to this:

const MySearchComponent = () => {
  const { query, rows } = useSelector((state) => 
    state.config);

  const {
      items,
      hasMore
    } = useSelector((state) => state.search);

  return (...)
}

useSelector takes a callback function that takes the state as an argument and returns a slice of the state.

So my first approach when trying to test the component was to send two different responses.

jest.mock("react-redux", () => ({
  useSelector: jest.fn()
    .mockReturnValueOnce(mockConfigState)
    .mockReturnValueOnce(mockSearchState)
}));

describe("MySearchComponent", () => {
  afterEach(() => {
    useSelector.mockClear();
  });
  it("should render", () => {
    const { getByTestId } = render(<MySearchComponent />);
    expect(...)
  });
});

Which worked fine until I realised that a child component also calls useSelector and therefore crashed. 😱

I knew I needed something that would support all possible selectors that I needed but still could be modified on a test by test basis.
I had a mock state ready, but not the method to alter and inject it.
Until I ran across jest.fn().mockImplementation

The solution to my problems

useSelector takes a callback as its argument and all I had to do was to call that callback with a compatible state that would satisfy all my components needs and they would do the rest as implemented.

jest.mock("react-redux", () => ({
  useSelector: jest.fn()
}));

describe("MySearchComponent", () => {
  beforeEach(() => {
    useSelector.mockImplementation(callback => {
      return callback(mockAppState);
    });
  });
  afterEach(() => {
    useSelector.mockClear();
  });
  it("should render a query", () => {
    const { getByTestId } = render(<MySearchComponent />);
    expect(getByTestId("query_testId").textContent)
      .toEqual(mockAppState.config.query)
  });
  it("should not render if query is empty", () => {
      const localMockState = {
        ...mockAppState,
        config: {
          ...mockShoppingState.config,
          query: ""
        }
      };
      useSelector.mockImplementation(callback => {
        return callback(localState);
      });
    const { queryByTestId } = render(<MySearchComponent />);
    expect(queryByTestId("query_testId")).toBeNull();
  });
});

So in the code above I mock useSelector from the react-redux npm package and replaces it with a function that executes any given callback function with my mocked state as an argument. This is done before every test.

In the second test I create a second mocked state that I want to use for just that test so I override useSelector to make sure it uses my updated state instead of the default mock state.

Parting words

I hope this helped someone to learn a little bit more about how to test their code and what can be achieved with jest and tools like RTL (which is great, try it!)

All typos my own and please leave a comment if you have a question or something does not make sense.